
020: HOW TO SET UP & RUN AN ART WORKSHOP
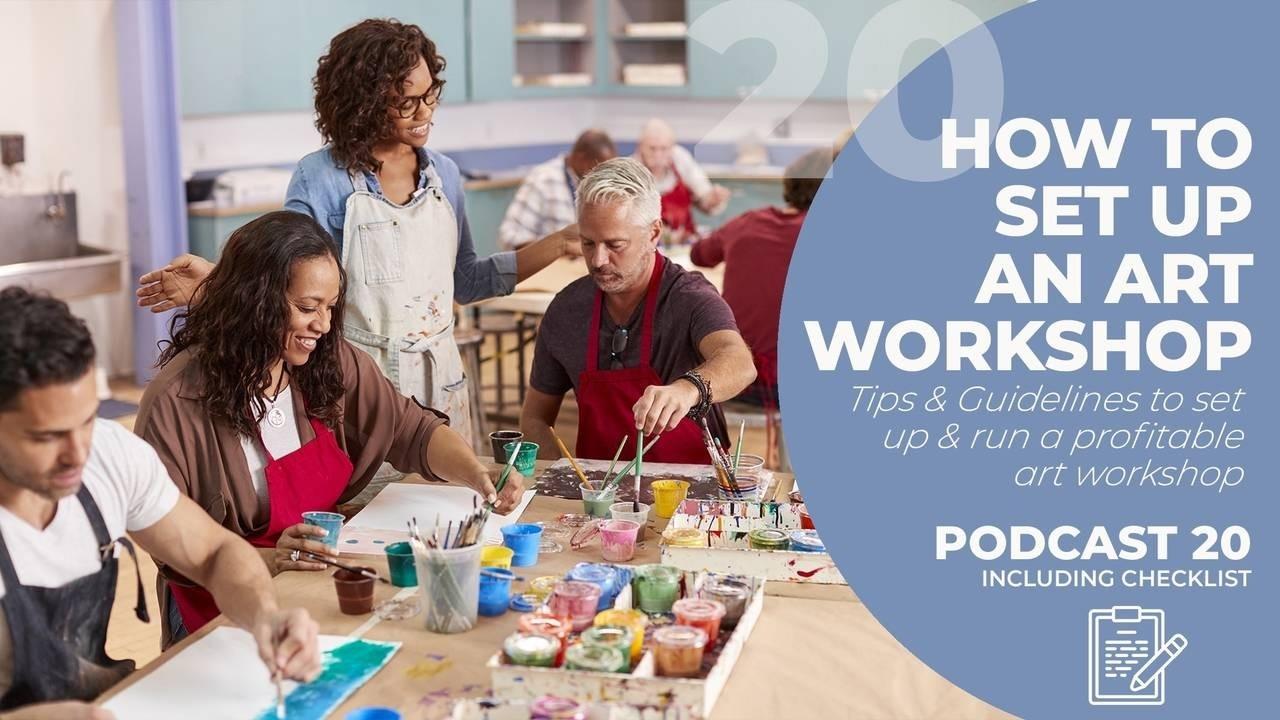
PODCAST EPISODE 020
ACCESS WORKSHOP SUCCESS FRAMEWORK

MORE ABOUT THIS EPISODE
'In learning we will teach and in teaching we will learn.' - Phil Collins
There has never been a more exciting time for artist's with a desire to teach and share their skills.
The internet has changed everything. We are more informed about what is out there and information is readily accessible and available. On the other hand we spend so much time sitting behind our computer screens there is an increased longing to use our hand....to create.
It is as if a perfect storm is developing. And this is where the opportunities lie for artists.
Sharing your skills will not only be a valuable experience for those willing to learn from you but it is also a great source of additional revenue for you so that you can continue to make your art.
As you probably already experienced, earning a living as an artist is not always easy or your income is not very consistent. By building an art teaching business you can add to the stability of your income.
Are you an artist and are you are thinking about sharing your skills with others?
Or are you already teaching but you have trouble filling your workshops or art events?
Then you are going to love this week’s episode. Press play or continue reading.
Recurring Income
As artists we paint a painting or sculpture or whatever art form you are doing, but that art piece we make once and we sell it. There is no recurring income from what we have spent hours preparing and doing. This can change when we start teaching and setting up an art teaching business to supplement your income. Now you can plan and prepare a lesson and offer this workshop numerous times or even turn it into a digital workshop.
But how do you start or set up an art workshop?
What can you teach?
How can you monetise your teaching efforts?
These are some of the questions we will look at in this episode.
Are you a teacher?
Do you:
- Love to work with people,
- Enjoy sharing your knowledge,
- Listen well and you are willing to repeat information,
- Have an inquisitive mind,
- Love to study and write lessons,
- Want to learn from your students just as much as they are willing to learn from you?
If you can say YES the most of these point then teaching is most likely something for you.
TED Talk
I recently heard a TED talk about a study that was done among primary school students. Children were asked to describe their favourite teacher and why?
The answer that kept coming up was surprising and one that I had to give some thought. The answer that was most prevalent was that 'good teachers ate apples'.
What was it about eating apples that made teachers loved and appreciated. Well, it came down to the fact that students want to identify with their teachers. They want to feel that their teachers are human, relatable and what they are teaching and learning from them is attainable. Just like eating an apple!
Art Teaching Perks
- Sharing skills
- Helping people express their emotions,
- Teach students to work with their hands,
- Help students get in touch with themselves and develop as individuals,
- You can make a positive contribute to community,
- Bring people together,
- Build new relationships,
- Enlarge your network,
- Connect with potential art buyers,
- You get an opportunity to share your vision,
- Sell your work/ products,
- Possibilities for future revenue streams by repeating a workshop or even teach online.
Honestly, this is an exciting time if you are considering adding teaching as a source of income.
Why is this the time to start teaching?
- People are looking for creative expressions,
- Renewed interest in learning arts & crafts,
- People have more disposable income than ever before,
- Possibilities to market and reach audiences,
- Internet makes communication and promotion attainable,
Growing Target Markets
The baby boomer market is growing at a rapid rate. A typical baby-boomer has come to the end of their career's but still have many desires. Many want to learn new skills and enjoy themselves at the same time. Art classes and learning creative skills is an excellent way for this generation to stay connected and develop themselves. They don't only have more disposable income but they also enjoy good health and they they have the time. This is a wonderful market for art teachers to share their skills.
Practical Resources
I love being as practical as possible and I want help you develop your workshop idea and reach your target market effectively.
I have created this 4- Step Framework to help you get a better understanding of what you need to set up and run a successful and profitable art workshop.
You can download the Workshop Success Framework at www.sonjasmalheer.com/workshopsuccess
In this resource I will share the 4 phases you can’t afford to skip when setting up and running your art workshop. If you follow these steps you can turn your workshop idea into a successful event and have your students coming back for more.
In this podcast & resource I will briefly look at these 4 must-do phases.
- Plan
- Preparation
- Promotion
- Presentation
‘ A goal without a plan is just a wish.’
Have you been wishing to set up and run an art workshop but nothing seems to be happening? All our dreams and goals start materialising when we have a PLAN.
Phase 1: Plan
The planning phase come with 4 steps:
Step 1:
It is time to do some soul searching. You need to first decide what you want. What makes you happy? What are you passionate about? What subjects would you like to teach?
In order for your workshop to be a success you first need to determine what makes you happy. If you are excited about your subject then this will rub off on your students.
Step 2:
Now you need to decide if there is a market for what you want to teach. What do your students want? It is no good teaching a topic that nobody want to learn. You need to do some research and be really honest with yourself.
If you are going to teach locally, in your community, then do some research as to what potential students want to learn.
Ask creatives around you or look at what is being offered in your area. A successful workshop is always the sweet-spot between what you are passionate about and what potential students are wanting to learn or experience. If you can offer and connect with what people are looking for then you will have overcome the most important hurdle and set yourself up for workshop success.
TIP: Have a look at your local art or creative centre. Take special note of workshops that have sold out. Why have they sold out? Is it the price, the subject, the teacher?
Step 3:
Next you need to decide the goal of your workshop. Why are you going to teach the topic you have chosen? What is your objective? Where do you want your students to be at the end of the day or weekend or year?
The clearer you are about your objective the easier it will be to make your workshop outline.
Do you enjoy teaching people to express themselves no matter what level they are? Or do you enjoy going deep and want to challenge students to develop their skills?
What do you want to achieve in the amount of time allocated to the workshop? Set realistic goals for the amount of time you have chosen. The biggest mistake beginning teachers make is that they are so excited about sharing their skills that they often give too much information. This can be overwhelming to your students and leave them more confused than empowered.
Step 4:
When you know what you are going to teach and that there is a market for it then you can decide what kind of form your workshop will be. In what kind of form are you going to pour your workshop?
Decide how often you want to teach and what kind of workshop will suit your lifestyle or artist routine. There are many forms you can choose.
Kinds of workshops:
- One-off
- Series
- Numerous lessons running with the school terms
- Bootcamp
- Summer School
- Private Workshop
You also need to consider:
- Age group - will you teach children, youth, all ages, elderly
- Level of experience - beginners, intermediate, advanced
- Technique - will you teach one specific technique
- Combination of techniques - will you teach combination or art principles
Find out what form best suits your goal, your potential students and techniques.
You have decided what you want to teach and that there is an audience out their willing to learn it then you can start with your preparation phase.
Phase 2: Preparation
Step 1: Preparing your lesson
1. Start by making an outline of your workshop
I love to use the sticky note technique.
You will need:
- Take a piece of foam core, (about A1 size, 33.1 x 23.4 inches)
- A Felt-Tip Marker
- Sticky notes
How does it work:
Start by giving your workshop a title. The title is like a coatrack that you will hang all your workshop content on. Write the title on a sticky note and paste it top centre of the foam core.
Example Workshop
Say you are offering a colour mixing workshop for beginners.
2. Give your workshop a title
Colour mixing for beginners: Get the colours right and your art will come to life.
Remember when you are teaching you will be taking your students from:
Point A - where the students are before your workshop to Point B - where you want them to be at the end of your workshop.
3. Define what your students point A is:
(write these points on a sticky note and paste left of the title)
BEFORE ATTENDING YOUR WORKSHOP
- little too no color theory,
- confused and insecure about colours
- feel stuck in their creativity,
- they know something is off what don’t know what?
4. Define what your students point B is:
(write these points on a sticky note and paste right of the title)
AFTER ATTENDING YOUR WORKSHOP
- Confident about mixing colors
- Discern why a color combination does not work
- Understand the basis of color theory
- Have enough tools to go home and apply this knowledge
- Found joy in painting and inspired to paint
Your workshop will take them from Point A to Point B in the designated time.
4. Write on sticky notes what 3- 5 steps students will need to take in order to go from Point A to Point B
(Write these 3-5 steps on various sticky notes and paste them in the next horizontal line, under the Title/ Point A & B - starting far left and ending far right)
Questions to ask?
- What are the 3-5 main points your student needs to master/learn to meet the objective/goal of the workshop? To reach Point B?
- What are the smaller stepping stones between these main points that your student needs to know/learn/do?
Break each step into smaller steps, write these smaller steps on sticky notes and stick them under the main steps.
This is your lesson framework. Build out these small stepping stones into a lesson plan with all the details on how you will deliver that information and get them from Point A to Point B
Step 2: Prepare your resources
Now that you have your outline and your lesson plan you need to decide on the materials will be needed in order do the exercises and tasks.
Decide these 3 things:
- What resources will your students need to bring?
- What resources will you provide?
- What handouts or demonstration pieces will you need to create?
Step 3: Book and secure a venue
Calculate ticket costs taking into account all expenses and the number of students you want to attend.
Step 4: Decide on your booking process and how you will track payments
There are online ticket payments system available but make sure you read the conditions carefully. You don't want to pay too much for each transaction.
In Phase 1 & 2 you have:
- Decided on your workshop,
- Determined that there are students out there wanting to learn it,
- Distilled this into a workshop outline,
- Decided on the materials & resources needed,
- Picked a date,
- Secured your venue,
- Determined your price.
Now it is time to start your promotion.
Phase 3: Promotion
Using the right promotional strategy is crucial in making your workshop profitable and a success. It is not enough to just post something on FB or rely on word of mouth.
Here are some effective ways to PROMOTE your workshop:
- Hang up a clear flyer where your potential students hangs out : eg: art supply shop, library, etc
- Choose your wording to communicate what you are going to do with care and after good thought. You are not just the teacher during the workshop but through the planning, preparation and promotion your 'teaching' has already started...You have never met your potential students but you are teaching them why they need to attend your workshop, what is in it for them and what they can expect.
- You are coaching potential students through your copy, the words and the images on your flyer. Be clear what you are going to offer. TIP: Find examples of flyers that you like.Why do they work, what do you like about them? What can you incorporate in your flyer?
- You can send a short digital ‘presskit’ to your local newspaper. Local press is always looking for inspiring events and if you offer value and good content they may be willing to place it in their papers.
- Use your own network. You can write a short email and send it to your own network. Tell your friends, family and colleagues that you are offering a workshop and attach the digital flyer. Ask them if they are willing to share it with their network.
- Be a guest on a podcast or blog to get attention and promote your workshop.
- If you have a little bit of a budget, then you could consider using Facebook ads. FB/ Instagram ads are a powerful tool to fill up your workshops. TIP: If you want to find good ad idea’s go to your other teachers in your field and visit their FB pages. In the Page transparency part on the right of the page you can see if they have active ads and what words they are using. Don’t copy but just see what they are doing and find what will work for your audience.
- A good FB ad consists of an image and copy all illustrating what you are going to do. Add a CTA - this a call to action. Button register now, book now and send them to your registration path of choice.
Questions to ask when starting promotional phase?
- What promotional materials do you need to create?
- Where can you promote your workshop locally?
- Will you promote on social media, website, emails?
- How will you engage your existing network?
Some extra idea’s to add spark your workshop promotion:
- Email a 'welcome pack' to your booked students - (don’t overwhelm them with too much info), just get them exited and you could add a material list for them to bring,
- Send them a reminder email a week before the workshop,
- Send an FAQ email.
The biggest reason for not signing up is not NO!
Indecisiveness is the biggest reason people do not register not the no's. It is important to do what you can to take away the objections and address their questions and possible insecurities.
TIP: Placing a comprehensive FAQ on your website or registration page is a great way to address all your potential students fears, objections and doubts about registering for your workshop.
Phase 4: Presentation
Here are some tips to make your workshop presentation more profitable and enjoyable.
Tip 1:
The day of your workshop
Your plan, preparation and promotion have clarified what you are doing and why! You understand the needs of your students and you have the right path for them to get from point A to point B
You have a clear lesson plan and you have spent quality time preparing for your workshop. You have invested time and money in promoting your workshop and you have filled your class.
All these quality steps, you take before the workshop day arrives, will add to the confidence you feel (and radiate) on the day of your workshop.
Arrive early so that you have plenty time to get yourself prepared.
Be welcoming...I have been to so many workshops where the teacher does not connect with the students. You feel like an intruder and this only makes students more insecure. You want to communicate that they are in a safe place where they are welcome and can create. Make sure your location is inviting, warm of cool enough and has enough ventilation.
Smile and enjoy.
Tip 2:
Keep your lesson plan close-by for reference and too keep you on track. Have a clock or watch within reach. I often put my mobile on still alarm so that I get a signal when I need to wrap up a certain section.
Tip 3:
Use the workshop to share you vision and more about your work. Tell students where they can find more about you and how they can stay connected with you. Have a card ready for people to fill out, with the GDPR content*, so you can legally add them to your mailing list.
* A law determined by the European Union stating that you need to officially ask for people's consent ( in writing or placing a tick) before you add them to your mailing list.
Tip 4:
Upselling! Do you have products they you can sell? Communicate this beforehand so that people come prepared. Maybe you have a colour-wheel for them to purchase or other materials like cards, books or calendars. Take time to share more about your products and give your students an opportunity to buy.
Tip 5:
Ask for feedback.
Ask your students:
- what their expectations were,
- what they learned,
- what they wish they had learnt,
This feedback is golden and will help you improve future lessons. Make a simple form for attendees to fill out at the end of the lesson and of course you could choose to do it anonymously.
Tip 6:
Ask people for testimonials. You can use these testimonials for your next promotional phase and on your website adding to your credibility.
Tip 7:
Send an email to your students a few days after the workshop. Thank them for being there and that you value them taking the time.
Review your feedback forms and make the necessary adjustments. Don’t wait until your next workshop to do this, even if you are tired, do it while it is still fresh in your mind.
Finding the sweet-spot between these 4 phases will help your workshop become more profitable and enjoyable.
-
Planning
-
Preparation
-
Promotion
-
Presentation
The more you give workshops the better you will become in these 4 phases.
If teaching is something you really love, then you will discover a wonderful way to earn extra revenue and as a supplement to your work as an artist.
Download this free worksheet filled with bonus insights, checklists and planning tips.
Get access to my latest resources!
Join now and be first to receive my latest resources, posts and downloads. You're information will not be shared.

